Building Acoustic Panels
Acoustic panels serve to absorb sound waves preventing them from reflecting on the walls and creating a distorted ‘echo’ sound. Acoustic panels are crucial for a good working of the spatial sound installation since reflected sound waves interfere with the emitted sound waves from the OmniDrivers (4DSOUND speakers) distorting the spatial audio experience. In this public knowledge bank, we will further elaborate on how to exactly build the panels, starting with a shopping list and building plan.

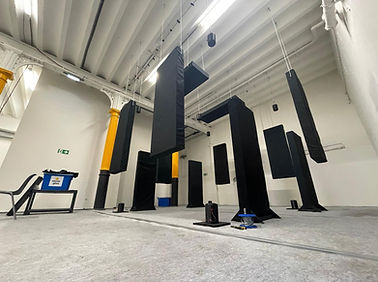
On the image, the final installation of Platform Project 2 Installation (2024) is visible. The acoustic panels are the black boxes standing on the floor and hanging in the sky.

Shopping list
Before building, the items from the shopping list need to be bought. Other than the shopping list items, the following tools are necessary: ruler, accutol, drill (with bits and screw heads), anuglar measure and handtacker.
Image | Part | Description | Dimensions (mm) | Quantity | Price per panel | Total amount needed | Total price (12 panels) |
|---|---|---|---|---|---|---|---|
Isolation Panel | Métisse cotton insulation board 12 cm 3.6m² Rd 3.05 | 1200 x 600 | 1,5 | € 18,81 | 4 | € 250,80 | |
Length wooden frame | Spruce wood planed 28x145 mm | 3600 | 1 | € 7,38 | 12 | € 88,56 | |
Width wooden frame | Spruce wood planed 28x145 mm | 3600 | 1 | € 7,38 | 12 | € 44,28 | |
Triangles wooden frame | Spruce wood planed 28x145 mm | 3600 | 3 | € 7,38 | 3 | € 22,14 | |
Flat connectors | Stainless steel corner set | 98 x 15 | 4 | € 7,99 | 3 | € 23,97 | |
Screws | Screw universal flat head galvanized 100 pieces | 4,5x70 | 20 | € 2,92 | 3 | € 35,07 | |
Texture / Terlenka Black | Shrink-free, wrinkle-free and colourfast | 150 | 2 | € 5,90 | 24 | € 70,80 |
Building plan
The building plan looks as follows, but the panel on the top was eventually also split up into two panels. The building steps and shopping list are made for twelve acoustic panels.


Start building!

01
Sawing
Saw all wooden beams into the correct sizes. In our case we used the following components of these dimensions:
-
Two vertical beams of 180cm
-
Five horizontal beams of 60cm
-
Four triangle corner parts. Make these by using an angular measure to make diagonal lines along the length of the beam dividing it into isosceles triangles.
02
Screws
A rule of thumb is to use screws that are 2,5 times as long as the thickness of the beam. Since our beams were 28mm thick we have used 70mm screws.


03
Connecting the beams
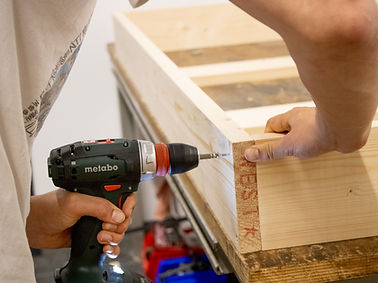
Using the screws, connect the vertical and horizontal beams creating a structure that fits around the metisse cotton plates perfectly.
04
Support beams
Once the outer frame is in place add the four triangles into each corner of the frame. The next step is to add the rear horizontal support beams to keep the cotton plates from falling out through the back of the frame. Place one beam behind the middle of the big cotton plate and one behind the point where the two plates meet.


05
Final beam
Finally, add an extra perpendicular beam on top of the support beam between the two plates to prevent them from leaning on top of each other since this will result in the bottom plate buckling when the frame is placed upright.
06
Applying the cotton
The cotton plates are 120cm long and the frame is 180cm long. This means we need a total of one and a half plates for one panel. To obtain this you must cut a plate in half using a sharp, non-serrated knife to make sure the material is cut and not torn up. Place both the cotton plates in the frame.


07
Covering with fabric
The last step is to cover the panels with fabric. Using a hand tacker first tack the fabric onto the bottom and top part of the panels, then the two sides and from there on work your way until each corner of the panel so the fabric is stretched out neatly over the entire panel. Do this for both the front and back of the panels.
You now have a functioning acoustic absorption panel.